I just love working on Christmas decorations. Especially when I get to make them all fru-fru! Today I’m making a Mrs. Claus boots wreath rail that is beautiful and elegant. You’re going to love it!
We all know that Mrs. Claus is a kind and classy lady and this Mrs. Claus boot wreath rail is giving off all those vibes! I absolutely love these beautiful boots and had so much fun dressing them up. In the video below I show you how to add the mesh, ribbon tails, and a fabulous bow to this rail. The results are ahhh-mazing! If you know anyone who loves Mrs. Claus or has a vintage Christmas theme, this rail would make a fabulous gift. I’m not sure I’ll be able to part with this one myself so if you keep yours I won’t blame you in the least!

How to Make a Mrs. Claus Boots Wreath Rail
I have really fallen in love with decorating wreath rails you guys. Don’t get me wrong, I still adore making wreaths but there is something so fun about these wreath rails! Each one is so unique and can be painted and decorated in so many ways. And, because there is already so much decoration to the rail itself, you don’t need nearly as many supplies when decorating it. I kid you not, it takes about a quarter of the mesh and ribbon you would use on a wreath. I can get maybe one wreath out of a roll of mesh but I can make 3-4 rails out of it. That’s awesome, especially when I am making multiples of my designs!
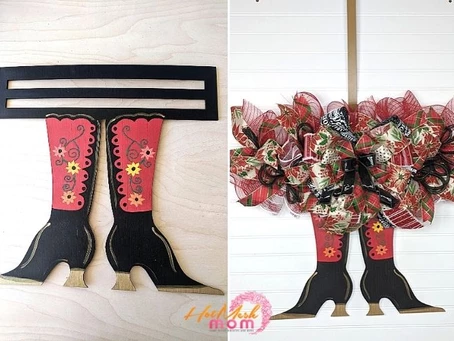
When you watch the video you will see that the boots on the rail I’m decorating are black. We also have a red boot version that is super cute. You can find either color on our website or you can get a blank one and paint it yourself. I also have a post where you can learn how to paint this Mrs. Claus boots wreath rail. If you choose to do your own you can really customize the colors and style!
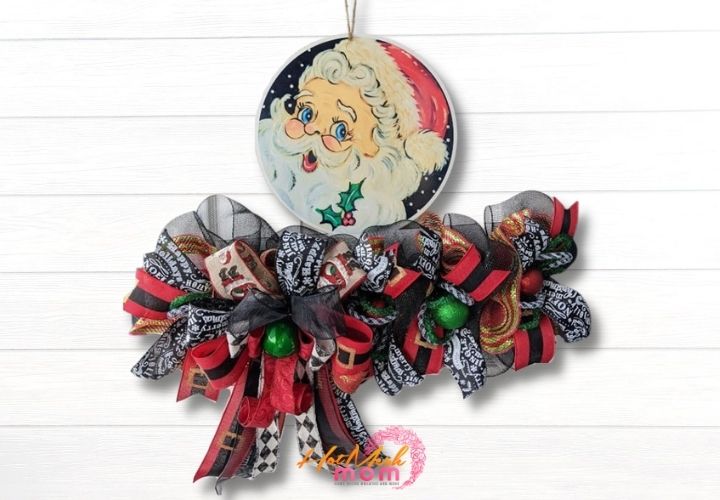
This rail is wonderful all on its own but if you’re wondering where Santa is we have him too. I also painted a Santa boot rail to go along with this one and they would look adorable hanging next to each other on a double door! You could also hang them on either side of one door. That way you could see one fabulous creation coming in and the other going out. That’s a whole lot of Christmas cheer!
Mrs. Claus Boot Rail Supply List
- Painted Mrs. Claus boots rail (paint-by-line tutorial here)
- Scissors
- Rotary cutter
- Ribbon tail board
- EZ Bow Maker
- Pipe cleaners
- 10” red mesh
- 10” red and white striped mesh
- Black tubing
- Black jelly ribbon
- 3- 2.5” Christmas ribbon
- 2- 1.5” Christmas ribbon
Wreath Rail Instructions
- Start by adding pipe cleaners to the rail. Put 5 at the top and 4 at the middle rail in a zigzag pattern.
- Next, cut 18” strips of your 10” mesh. I cut 5 strips of red and 4 of the striped mesh.
- Now take a strip of red mesh, curl up the ends slightly and then scrunch it up the center. Add this to the pipe cleaner at one of the ends of the rail. For the next pipe cleaner use the same method on a strip of striped mesh. Continue alternating the meshes until your pipe cleaners are all full.
- Next, take the black tubing and cut 8 20” strips.
- Use the ribbon tail board to measure 8 14” tails of one 2.5” ribbon and one 1.5” ribbon. Dove tail the ends.
- Place one 1.5” tail on top of one 2.5” tail. Fold in the center and pinch that center mark. Add the center point to one of the pipe cleaners. Repeat this process on each pipe cleaner except the center one.
- Next, one at a time, fold the strips of tubing into loops and add one to each pipe cleaner except the center one.
- Grab the EZ Bow Maker and start with one of the 2.5” ribbons. Measure a 10” tail and then make 2 6” loops on each side. Repeat with two more of the 2.5” ribbons making your loops slightly smaller with each ribbon.
- Next, repeat this same method with two of the 1.5” ribbons.
- Now use the jelly ribbon and repeat the same method except only make one loop on each side.
- Take two pipe cleaners and twist the ends together to make one large one. Carefully remove the bow from the bow maker, use the pipe cleaners to secure the center and twist off at the back.
- Attach the bow to the center of the rail and twist off at the back to secure it.
- Finally, dovetail the ribbon ends and curl the ends of the jelly ribbon.
My goodness I just love how this rail turned out! The boots are adorable and coordinating ribbons add so much elegance. I’m loving the way the black tubing and jelly ribbon really pull out the black in the boots and pull the whole thing together. I really hope you have as much fun with this Christmas creation as I did!

If you want to make your very own wreath rail exactly like this one, then check out the recipe card below for all of the details.
If you need any help with painting your own wood signs or wreath rails and decorating your custom wreath rails, be sure to check out more of our tutorials on Hot Mesh Mom Blog.
We would love to see your amazing wreath rail designs! Please share with us over at the Hot Mesh Mom Facebook.
DIY Mrs. Claus Boots Wreath Rail
Mrs. Claus Boot Rail Supply List
Wreath Rail Instructions
- Start by adding pipe cleaners to the rail. Put 5 at the top and 4 at the middle rail in a zigzag pattern.
- Next, cut 18” strips of your 10” mesh. I cut 5 strips of red and 4 of the striped mesh.
- Now take a strip of red mesh, curl up the ends slightly and then scrunch it up the center. Add this to the pipe cleaner at one of the ends of the rail. For the next pipe cleaner use the same method on a strip of striped mesh. Continue alternating the meshes until your pipe cleaners are all full.
- Next, take the black tubing and cut 8 20” strips.
- Use the ribbon tail board to measure 8 14” tails of one 2.5” ribbon and one 1.5” ribbon. Dove tail the ends.
- Place one 1.5” tail on top of one 2.5” tail. Fold in the center and pinch that center mark. Add the center point to one of the pipe cleaners. Repeat this process on each pipe cleaner except the center one.
- Next, one at a time, fold the strips of tubing into loops and add one to each pipe cleaner except the center one.
- Grab the EZ Bow Maker and start with one of the 2.5” ribbons. Measure a 10” tail and then make 2 6” loops on each side. Repeat with two more of the 2.5” ribbons making your loops slightly smaller with each ribbon.
- Next, repeat this same method with two of the 1.5” ribbons.
- Now use the jelly ribbon and repeat the same method except only make one loop on each side.
- Take two pipe cleaners and twist the ends together to make one large one. Carefully remove the bow from the bow maker, use the pipe cleaners to secure the center and twist off at the back.
- Attach the bow to the center of the rail and twist off at the back to secure it.
- Finally, dovetail the ribbon ends and curl the ends of the jelly ribbon.
Just pin this project tutorial to save the instructions for later!