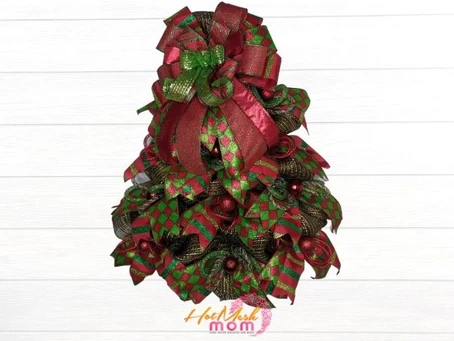
We are back with another adorable Christmas project for you guys! Today I am showing you how to make a snowman corner rail that is just too cute for words!
Christmas decor is all about the extras. Extra bows, extra bling, extra fun. The snowman corner rail that I am making for you today is extra in so many ways. I can’t wait for you to see how it turns out! In the video below I show you how to work with a corner rail and how to add all those beautiful extras. You’ll find the supply list and step-by-step instructions below and then you can watch the video for all my tips, tricks, and witty humor.

Make Your Own Snowman Corner Rail
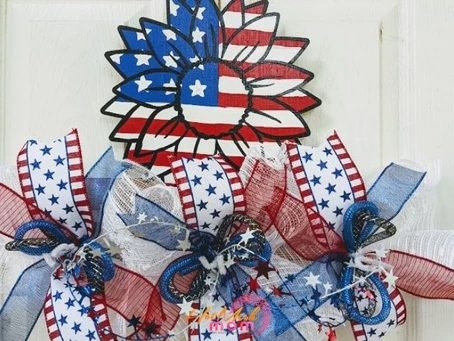
We are always striving to bring you guys new and exciting project designs and we are really excited about this one. Corner rails are a unique crafting design that you definitely don’t see everywhere. These pieces can be hung in several different ways so that you can use them however you like best. You could rest them on your mantel corner and let it hang down for a unique look or stand it up in an L shape in the same area. Just please don’t catch anything on fire!
Another place you could display a corner rail is above a window or door frame. I tested mine out on a Command hook that is rated for 5lbs and it did really well. You’ll just need two of them to make sure that the rail hangs straight. You could even make two of these and hang them on either side of your door frame with something Christmasy in the center. That would be a showstopper for sure!
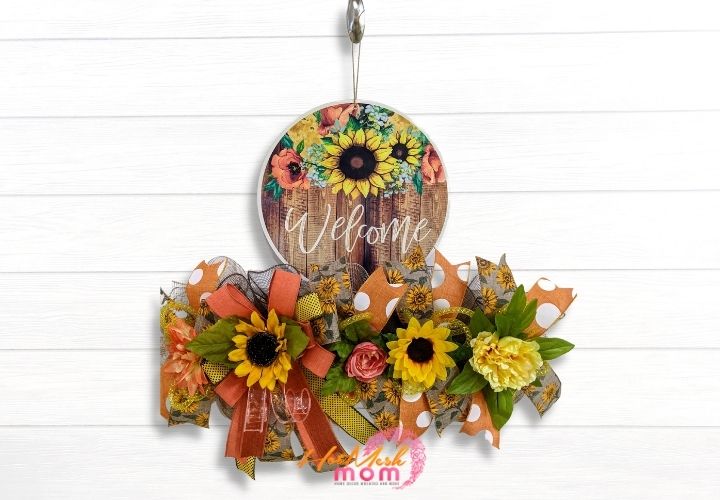
As always I encourage you to make this project your own. I use an adorable snowman wood cutout for this but you could use any Christmas sign that you love. You could also add some Christmas balls to this for more sparkle and shine. There are also a zillion different kinds of holiday picks that would make an awesome addition to this piece. These rails are also not just limited to Christmas.
Snowman Corner Rail Supply List
- Wooden corner rail
- Snowman wood cutout (painted)
- 21” mesh
- 1.5” ribbon
- 2- 2.5” ribbons
- 4” ribbon
- Tubing
- 11 pipe cleaners
- Ribbon tail board
- Foam craft squares
- Dap rapid fuse glue
- Staple gun
Corner Rail Instructions
- Attach the pipe cleaners to the corner rail, 5 on each side with one at the corner.
- Take the 21” mesh and fold over the end. Attach to the first pipe cleaner on your rail. Make a 10” poof and then attach to the next pipe cleaner. Continue this around the rail until it is full.
- Use the 13” measurement on the ribbon tail board to make 4 26” strips of each 2.5” ribbon.
- With each one measure 5” then make a loop and add to every pipe cleaner except the ones on the ends. Alternate your patterns at every other pipe cleaner.
- Use the 1.5” ribbon to make hand bows with 5” loops for every other pipe cleaner.
- Next, take the 4” ribbon and make 2 hand bows with 8” tails and 12” loops. Attach these to either end of the rail.
- Next, cut your tubing to 21”. Take a piece and loop it then pinch it at the center and attach to the pipe cleaners that don’t have the small bows. Add them to the top of your bows at the ends as well.
- Flip your sign over and use the rapid fuse glue to attach the craft foam to the back. Use the staple gun to staple pipe cleaners to the foam.
- Finally, attach your sign to the corner of the rail by working the pipe cleaners through the mesh and tying them off to the rail.

So that’s it you guys, super cute and super fun! I obviously did this as a Christmas project but that’s not the only thing you can do with these rails. You can decorate them for any holiday or for year round use. The possibilities truly are endless!
If you want to make your very own wreath rail exactly like this one, then check out the recipe card below for all of the details.
If you need any help with painting your own wood signs or wreath rails and decorating your custom wreath rails, be sure to check out more of our tutorials on Hot Mesh Mom Blog.
We would love to see your amazing wreath rail designs! Please share with us over at the Hot Mesh Mom Facebook.

How to Create a Snowman Corner Rail
Snowman Corner Rail Supply List
Corner Rail Instructions
- Attach the pipe cleaners to the corner rail, 5 on each side with one at the corner.
- Take the 21” mesh and fold over the end. Attach to the first pipe cleaner on your rail. Make a 10” poof and then attach to the next pipe cleaner. Continue this around the rail until it is full.
- Use the 13” measurement on the ribbon tail board to make 4 26” strips of each 2.5” ribbon.
- With each one measure 5” then make a loop and add to every pipe cleaner except the ones on the ends. Alternate your patterns at every other pipe cleaner.
- Use the 1.5” ribbon to make hand bows with 5” loops for every other pipe cleaner.
- Next, take the 4” ribbon and make 2 hand bows with 8” tails and 12” loops. Attach these to either end of the rail.
- Next, cut your tubing to 21”. Take a piece and loop it then pinch it at the center and attach to the pipe cleaners that don’t have the small bows. Add them to the top of your bows at the ends as well.
- Flip your sign over and use the rapid fuse glue to attach the craft foam to the back. Use the staple gun to staple pipe cleaners to the foam.
- Finally, attach your sign to the corner of the rail by working the pipe cleaners through the mesh and tying them off to the rail.
Just pin this project tutorial to save the instructions for later!