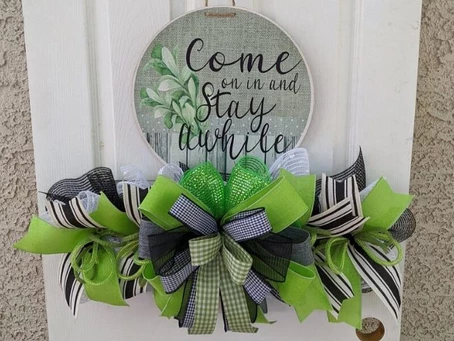
I’m excited to share a fun project with you guys today! I’m making a Happy Camper everyday door hanger that is beautiful and perfect for displaying at home or on the road.
I don’t know about your neck of the woods but it is definitely in full swing camping season here in Nevada. We are seeing the campers and RVs all over the highways on their way to adventure. In the video below I am showing you our Happy Camper everyday door hanger and how to decorate it.
Richard is along for the ride with me on this one and has even picked out most of the supplies and helped with the painting. You know what they say, the couple that crafts together, stays together. Ok maybe they don’t say that, but they definitely should!

Make Your Own Happy Camper Everyday Door Hanger
I realize that not everyone knows what an “everyday” door hanger is so I wanted to take a minute to explain. In the creative biz we call things “everyday” or “evergreen” when they can be displayed between the holiday seasons. These are the kinds of decor that you can put up any day of the year and leave up as long as you want.
It’s great to have these designs in your home and, if you sell your items, especially good to have them available in your shop. Everyday designs can be displayed every day but they can also be purchased every day! That’s a huge win for your creative business.
When you watch the video below, you will see that we are using our spool board to hold the ribbons and make a bow. If you are new to us and aren’t sure what the spool board is or how to use it, check out our post How to use a Ribbon Spool Board. In that post, I show you how to assemble it and explain all the ways that you can use it as an extra hand while crafting!
Staining your door hanger
You may have already noticed that we did something a little different with this wreath rail. Normally, I paint the rails, but this time Richard got the stain out and went to town. We did paint the camper and the mountains, but the majority of this rail is in the words and that’s where we did the stain. Staining the rails is super quick and easy and gives them an elegant look. So, if you don’t like to paint (or just don’t have time) keep this option in your back pocket! Just use paper towels or a foam brush to add an even layer of stain. Then, let it dry well before you start adding your ribbons and mesh.
Supplies You’ll Need for the Happy Camper Everyday Door Hanger
- Happy Camper wreath rail
- Pipe cleaners
- 21” mesh
- 5.5” burlap mesh
- 2.5” ribbon
- 1.5” ribbon
- Ribbon tail board
- 2 colors of tubing
- Spool board
DIY Everyday Door Hanger Instructions
- Start by attaching 6 pipe cleaners evenly around the center rail of the wreath rail.
- Next, take the 21” mesh, roll up the end a little and make a ruffle. Add that to the tie on one end of your rail. Then make a poof with the mesh and add the other end of it to the next rail. Continue this until you come to the end of your rail and then leave about 10” and trim the mesh off the roll. Use that extra 10” to make a ruffle at the end of the rail.
- Then cut 6 10” strips of the 5.5” burlap. Scrunch the center to make a bow tie and add the center of the bow tie on top of the 21” mesh using the twist tie to secure it in place.
- Use your ribbon tail board to cut 5- 14” ribbon tails of two 2.5” ribbons. Dovetail both ends of the tails.
- Take one of each type of ribbon tail and place one on top of the other. Fold the tails in half and pinch the center together. Attach the center pinch to a twist tie on the wreath frame. Repeat with the remaining ribbon tails and twist ties.
- Cut both colors of tubing in 20” strips. Lay one of each together. Make a circle with the strips and then pinch it at the center to make a bow tie. Add the center of the bow tie to one of the ties. Repeat this process with the remaining tubing strips and ties.
- Next we make a bow! Get out your spool board and your ribbons. Start with a 2.5” ribbon, measure a 10” tail, twist the ribbon and then add it to the bowmaker pegs of your spool board. Then make a 6- 7” loop, twist, add it to the pegs. Make another loop on the other side then two more loops, trim after a 10” tail.
- Use another 2.5” ribbon to repeat the same process making two loops this time and your loops a little smaller this time.
- Then use a 1.5” ribbon to make 4 loops using the same process and then again with another 1.5” ribbon.
- Take two pipe cleaners and twist the ends together to make one long pipe cleaner. Remove your bow from the bow maker and use the long pipe cleaner to secure the center of the bow twisting it off at the back.
- Use the pipe cleaners on the bow to push through the mesh and attach the bow to the wreath rail. Dovetail the ends of your ribbon tails and fluff the bow.

If you want to make your very own wreath rail exactly like this one, then check out the recipe card below for all of the details.
I really had fun making this everyday door hanger with Richard. I think he did a fabulous job making the supply selections. I’ll have him making bows in no time! If you are loving the Happy Camper theme be sure to check out our Happy Camper Wreath Rail Tutorial. It’s another adorable rail that is perfect for your front door or for a camper or RV!
If you need any help with painting your own wood signs or wreath rails and decorating your custom wreath rails, be sure to check out more of our tutorials on Hot Mesh Mom Blog.
We would love to see your amazing wreath rail designs! Please share with us over at the Hot Mesh Mom Facebook.

DIY Everyday Door Hanger for Happy Campers
Supplies
Happy Camper wreath rail
Pipe cleaners
21” mesh
5.5” burlap mesh
2.5” ribbon
1.5” ribbon
Ribbon tail board
2 colors of tubing
Spool board
Directions
- Start by attaching 6 pipe cleaners evenly around the center rail of the wreath rail.
- Next, take the 21” mesh, roll up the end a little and make a ruffle. Add that to the tie on one end of your rail. Then make a poof with the mesh and add the other end of it to the next rail. Continue this until you come to the end of your rail and then leave about 10” and trim the mesh off the roll. Use that extra 10” to make a ruffle at the end of the rail.
- Then cut 6 10” strips of the 5.5” burlap. Scrunch the center to make a bow tie and add the center of the bow tie on top of the 21” mesh using the twist tie to secure it in place.
- Use your ribbon tail board to cut 5- 14” ribbon tails of two 2.5” ribbons. Dovetail both ends of the tails.
- Take one of each type of ribbon tail and place one on top of the other. Fold the tails in half and pinch the center together. Attach the center pinch to a twist tie on the wreath frame. Repeat with the remaining ribbon tails and twist ties.
- Cut both colors of tubing in 20” strips. Lay one of each together. Make a circle with the strips and then pinch it at the center to make a bow tie. Add the center of the bow tie to one of the ties. Repeat this process with the remaining tubing strips and ties.
- Next we make a bow! Get out your spool board and your ribbons. Start with a 2.5” ribbon, measure a 10” tail, twist the ribbon and then add it to the bowmaker pegs of your spool board. Then make a 6- 7” loop, twist, add it to the pegs. Make another loop on the other side then two more loops, trim after a 10” tail.
- Use another 2.5” ribbon to repeat the same process making two loops this time and your loops a little smaller this time.
- Then use a 1.5” ribbon to make 4 loops using the same process and then again with another 1.5” ribbon.
- Take two pipe cleaners and twist the ends together to make one long pipe cleaner. Remove your bow from the bow maker and use the long pipe cleaner to secure the center of the bow twisting it off at the back.
- Use the pipe cleaners on the bow to push through the mesh and attach the bow to the wreath rail. Dovetail the ends of your ribbon tails and fluff the bow.
Recipe Video
Just pin this project tutorial to save the instructions for later!